How To Build an Outdoor Pizza Oven
17 Step-by-Step Instructions for building your backyard DIY pizza oven (in less than 2 weeks)
So perhaps you have tasted wood-fired pizza and the pizza oven bug has got you! If you can follow basic instructions, enjoy DIY projects, and love the thought of having your own outdoor pizza oven, then this article is for you. If you are also on a budget – then this article is really for you.

A little about us. We’re just average people with average budgets and skills. We’re not pizza professionals or have masonry skills (until now). We’re just foodies and love a good pizza and home projects.
Many of the resources available about oven making are from experts in cooking and masonry. Some are also designed for commercial use. We bought some of their books during our research, researched a lot online, and we used a lot of good information from them.
For us, however, most of the outdoor pizza oven plans seemed overkill for our purpose – extremely detailed, complicated (for our skillset), and expensive. We also discovered there are so many differing opinions about what the best materials are to use for your oven (i.e. clay, firebrick, etc.). Our opinion is that you really can’t go wrong with any options you choose. Your pizza will taste better than any you can bake in a normal oven. And you will be amazed at the high temperature from 750 – 900 degrees, pizza really does cook in just 90 seconds! Pretty cool.
We built our brick pizza oven and have enjoyed it so much that we wanted to share our experience. You, too, can build a wood-fired oven on a budget (or not) and cook like the rest of them!
Our oven was adapted from a combination of several different sources, and we recommend you check out many ovens before deciding on the one. Since there are so many variables depending on the materials used, we didn’t include an exact plan here.
If you want a purely functional oven and don’t care about looks, you can build it for very little. The cost of yours will depend on a number of factors. Depending on your ability to find cheap brick and materials, you can build a small oven for $400-$900 (or less). The price varies depending on some of the optional items discussed later. The most expensive items for our DIY brick oven were the firebrick, pre-formed clay dome, front arch, and cement pavers for the base. We were able to get a lot of the items from Craigslist and our local hardware store.
With just a few resources, money, and time you will be cooking pizza better than any you can get in most restaurants in a very short time. Your house will become the “pizza haven” for many admirers, and it will be hard for you to go back to just “average” pizza again. While throwing pizza parties and making your own dough can be a lot of work, it’s also very rewarding to prepare food the way you like with the freshest of ingredients.
We hope you enjoy this article and are inspired to build your very own outdoor pizza oven.
- How To Build an Outdoor Pizza Oven
- 17 Step-by-Step Instructions for building your backyard DIY pizza oven (in less than 2 weeks)
- Step 1. Decide on the brick oven or pizza oven kit and plans that are best for you
- Step 2. Prepare a materials list
- Step 3. Prepare the base the oven will rest on
- Step 4. Use cement blocks to raise the pizza oven
- Step 5. Prepare the base of the pizza oven using firebrick
- Step 6. Prepare the base of the pizza oven dome
- Step 7. Place the clay dome on the surrounding firebrick
- Step 8. Secure the archway of your outdoor pizza oven
- Step 9. Place Thermocouple K Wire on the dome of the oven
- Step 10. Add another set of firebricks on top of the dome
- Step 11. Build the outer part of the oven around the dome
- Step 12. Insulate the oven around the dome and sides
- Step 13. Finish the flue
- Step 14. Build the oven door
- Step 15. Finish the outside of the oven with brick
- Step 16. Finish the thermocoupler wiring
- Step 17. Other optional finishing touch items
- Pizza making supplies
- 17 Step-by-Step Instructions for building your backyard DIY pizza oven (in less than 2 weeks)
Step 1. Decide on the brick oven or pizza oven kit and plans that are best for you
We researched online and purchased four books to help us decide. By doing so we learned which oven was best for our skillset and how we wanted the oven to look. Our final design included a combination of a few designs. We did not follow one plan to the “T” although you certainly could if you like. There are many pizza oven plans available online. And these days there are many DIY pizza oven kits (when we built our oven there weren’t very many available).
Since we decided on a brick pizza oven with a preformed clay dome and arch, that’s what will be discussed here.
We just wanted a basic backyard outdoor pizza oven that looked nice, was safe and would cook awesome pizza. We didn’t care about winning any awards for looks, and it wasn’t for commercial purposes. Therefore, we cut corners on certain things (and saved a ton of money).
Questions to Ask Yourself
- What type of oven would you like to build? i.e. brick, clay, etc.
- What is your budget? This will determine your materials and where you purchase them. We saved a lot of money by purchasing our outer bricks on Craigslist (U.S.).
- Will your oven be portable, or fixed? Ours is fixed, but you could certainly build one designed to be moved either to protect it or cook elsewhere.
- Will you build a cover for your outdoor pizza oven to protect it from weather? In hindsight we wished we would have done this, because it rains a lot where we live in the Pacific Northwest. Waterproofing will be necessary in many climates. Especially for brick ovens.
- Where will you build it? How large is the area, and do you have ample space away from building structures, fences, trees, plants, etc. ? Consider height and width. Refer to your local building codes before you start to build it.
- What size do you want it to be? How many pizzas’s do you want to be able cook at one time? What else do you want to cook in it?
Recommendation: Build your oven dome as large as you can. One of our biggest regrets is that we built a smaller oven with a premade clay 27” dome, and we can only cook one pizza at a time. Even though the pizzas cook between 90 seconds and 2 minutes, if you are entertaining a large group, it’s nice to be able to tend the fire and cook multiple pizzas. And we learned it doesn’t take that much more wood to heat a larger oven.
The answers to these questions will determine the plan and cost for your oven. Once the initial planning of step 1 is decided, you are on your way to building your DIY pizza oven in less than two weeks (assuming it’s not the middle of winter or rainy season). Your weather will help determine how quickly your oven will be ready to get fired up allowing the mortar to dry thoroughly if you choose a brick oven plan.
Now the fun begins. Decide on a pizza oven plan that you like. Modify the oven design based on the questions above. Below are the books and resources we used to build our oven:
- Your Brick Oven – Building It & Baking In It, by Russell Jeavons
- Build Your Own Earth Oven, by Kiko Denzer
- The Bread Builders – Hearth Loaves and Masonry Ovens, by Daniel Wing and Alan Scott
- Building A Wood-Fired Oven for Bread and Pizza, by Tom Jaine
- Traditional Oven
- YouTube also has a lot of great videos on Oven Building and Pizza Making
- There are many other free resources, and forums via the web on building backyard pizza ovens.
Step 2. Prepare a materials list
Below is a general list of the items we used. Many of the items were found on craigslist. The firebrick, dome, and arch were purchased from a local building supply warehouse.
The Base
- Pit gravel/rock
- Sand
- Concrete pavers
- Cement blocks
- Other Option: Concrete floor, rebar and cement (since we were building down in heavy clay soil, we did not build ours with rebar or pour a cement base) We have not had any problem with shifting of the oven at all, but your soil foundation might be different. If you’re concerned about the ground surface your oven will be on, pour a concrete slab for your base. Also be sure to check with your local building code department to see if there are any requirements.
The Oven
- Firebrick (inside the pizza oven)
- Outside brick (found on craigslist.org)
- Premade Clay Dome (optional, ours was 27” and wish we would have gone bigger)
- Arch entry to pizza oven (optional, can use firebrick)
- Refractory mortar for firebrick
- Standard mortar for outside brick oven
- Pizza oven door (wood, metal, and vermiculite as an insulator)
- Vermiculite (for insulation in door and inside the inner and outer oven. You can also use brick and bottles to fill up additional spacing in the oven)
Extras and Oven Utensils
- Multimeter (This is the one we purchased)
- Thermocouple wire Type K (Depends on the width of your wire)
- Thermocouple Mini Probes/Connectors (4-6) – these may come with the wire you purchase
- Ash dispenser
Below is a list of our costs. For a pdf copy of this article and an Excel/Google sheet template that you can use and modify in Excel enter your first name and email here.

Step 3. Prepare the base the oven will rest on
Dig the ground as needed, add the pit gravel, sand and arrange the concrete pavers. Optionally you could also pour a concrete base. We dug nearly 6” deep in clay soil and have never a problem with ours in over 5 years. It was recommended that we extend our cement pavers 24” past the outside dimensions of the oven.

Step 4. Use cement blocks to raise the pizza oven
Align the blocks butt-to-butt, crisscrossing them as shown below. You’ll be placing the cement open side on the top and bottom. Fill the cement blocks with sand and pack them down very tightly. To avoid heat loss on the oven floor, you’ll want to avoid having solid cement blocks up against the fire bricks (having sand, vermiculite, or another insulator will help with this). We mortared the bottom and top set of pavers, but not ones in between.
Top with a layer of concrete pavers and level.
Two levels of blocks make up the base of our brick pizza oven, (however, we built on elevated ground). You’ll want the height of your base to be comfortable reaching in and out of your oven (about waist height). The opening of our oven is 36” from the ground and works very well for us. (Estimated time: Steps 3 and 4 can easily be completed within a day if you’re not pouring concrete). If you’re pouring concrete, you’ll need to allow additional time for drying.
You can use other materials for your base as well. Solid cement, brick, steel frames, metal water tanks. Just make sure it will be a solid foundation. If you want a portable pizza oven that is movable you’ll need to find a rolling cart that can hold the weight of your oven.
Step 5. Prepare the base of the pizza oven using firebrick
Two levels of firebrick make up the base of the oven. Use refractory mortar to secure the first set of firebrick to the cement pavers. To maintain a very level and tight floor, we did not mortar in between the firebricks but placed them butt to butt. Lay the bricks end to end. On the second layer, reverse the direction of the bricks (as shown below).

Step 6. Prepare the base of the pizza oven dome
Since we chose to purchase a premade clay dome we arranged two layers of firebrick end up. The bricks should be aligned with the bottom of the dome (see picture below). At this time we also placed the arch opening as a guide (do not mortar yet). One advantage to the clay dome we chose was that it was a time saver. Once the two layers of brick were aligned, we temporarily removed the dome and mortared the firebrick.
The preformed clay dome and archway is Optional – you can use firebrick instead to build your pizza dome and archway. Using a preformed dome saved us a lot of time. There are also many DIY pizza oven kits available that we didn’t have the luxury of when we built our oven. If you’re not sure about the pros and cons of cooking in a clay dome vs. brick there are a lot of discussions online and youtube videos.
Step 7. Place the clay dome on the surrounding firebrick
Mortar the bottom of the dome to the firebricks. If you’re not using a pre-formed dome, continue forming the dome with firebricks. You can form your dome in a square or half circle like shown. You will need to build a mold if you’re building one like pictured.
You might want to review the opinions of what others say about a square dome inside your oven.
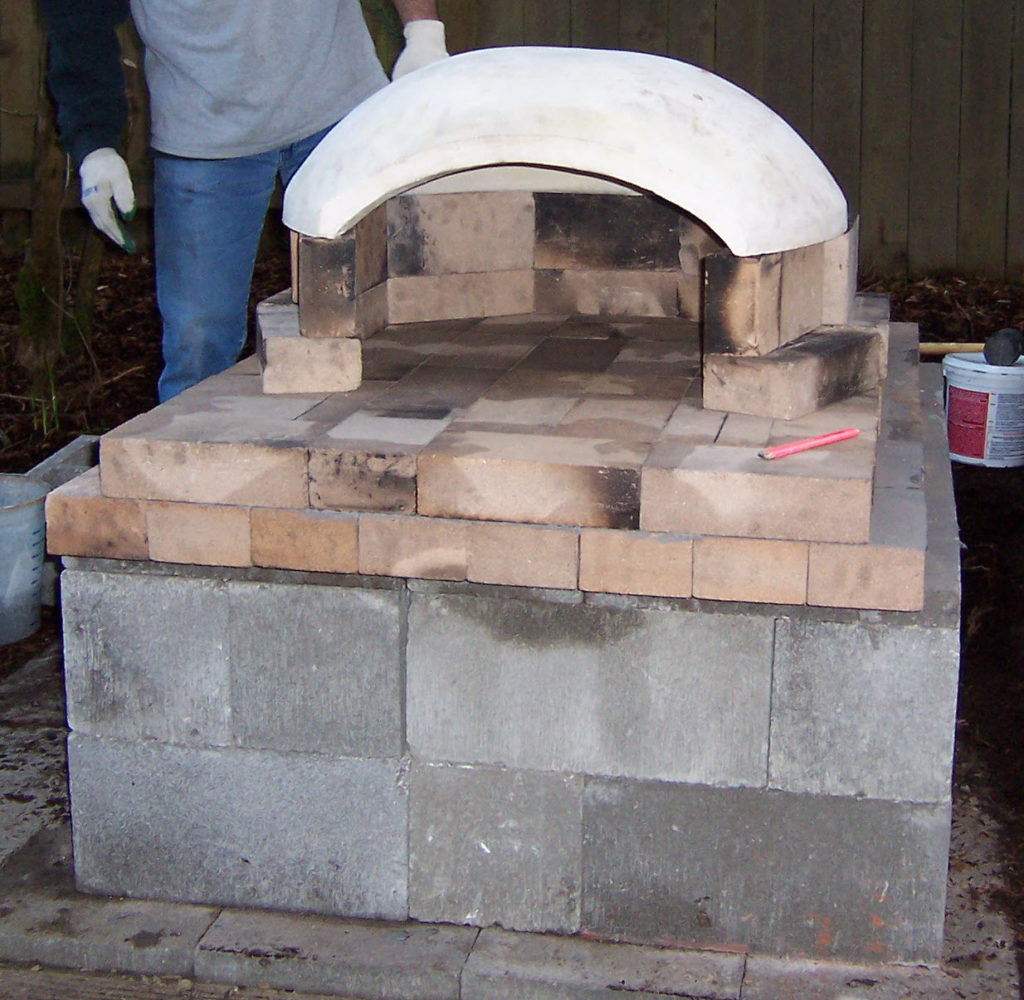
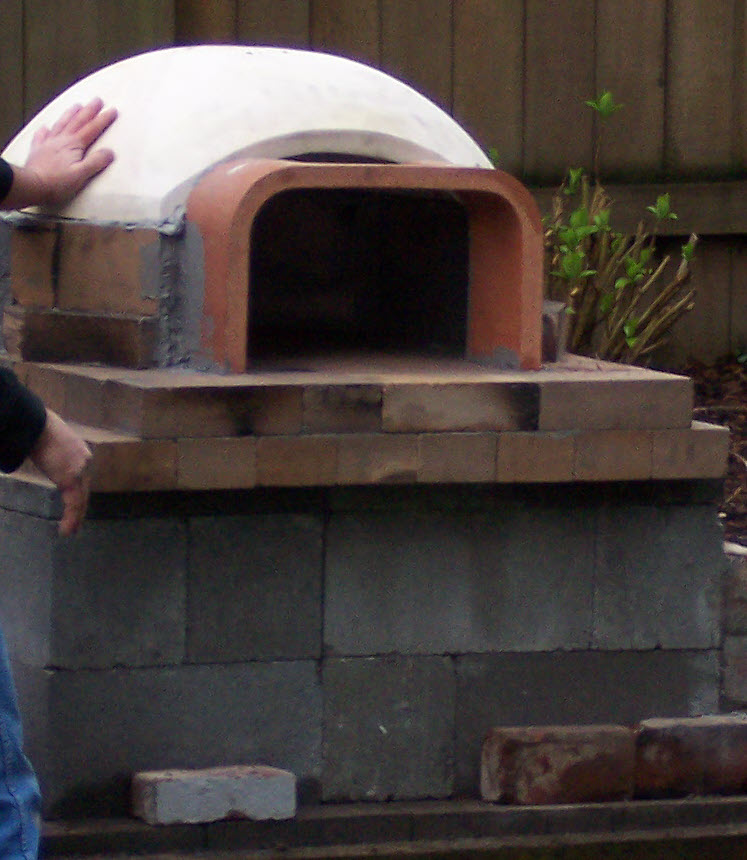
Step 8. Secure the archway of your outdoor pizza oven
Use either the preformed arch or firebricks. Secure with refractory mortar.
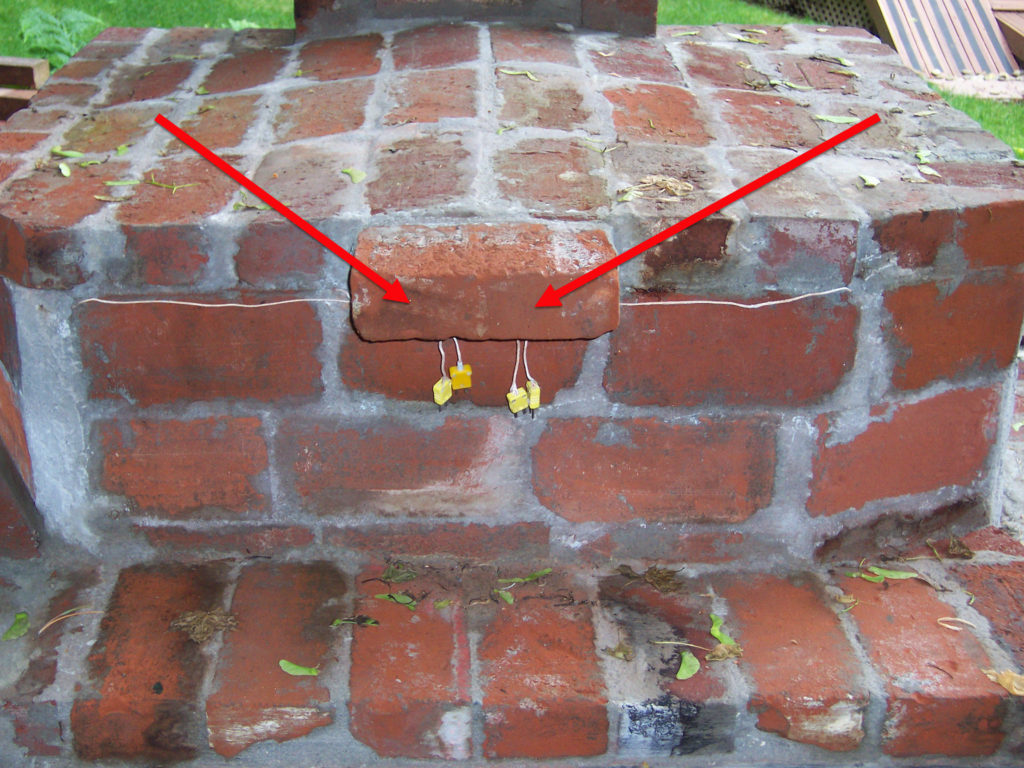
Step 9. Place Thermocouple K Wire on the dome of the oven
Although this is optional, it’s highly recommended. You will not be able to do this later (unless you disassemble your oven) and you won’t regret it. By including this wire, you’ll be able to measure the heat of the dome in different parts of the oven. This is a fabulous tool that eliminates the guessing game (especially when you’re still learning how to cook in your oven).
We used 4 wires and placed them on the dome on the left, right, top, and back (be sure to label them so later you know which one is which). Leave plenty of wire and string them to the back of the oven (or wherever you want them located). You’ll add the connectors to the wire in Step 16.
Step 10. Add another set of firebricks on top of the dome
Mortar and fill in all of the spacing of the firebrick placed on top of the dome of your pizza oven. Start the flue by adding firebrick to the top of your archway. Mortar all sides of the firebrick here as well.
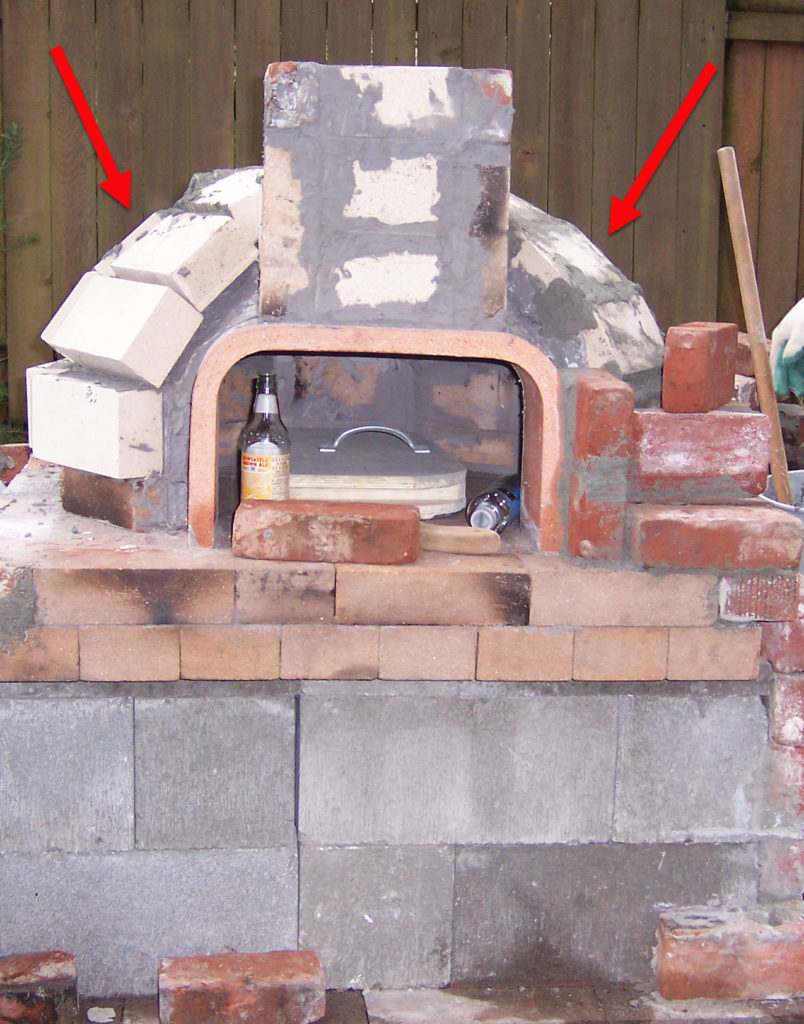
Step 11. Build the outer part of the oven around the dome
We chose standard bricks that we found on craigslist. Use a standard mortar and set the bricks around the sides of the oven. Build them high enough to insulate around the top of the dome as well.
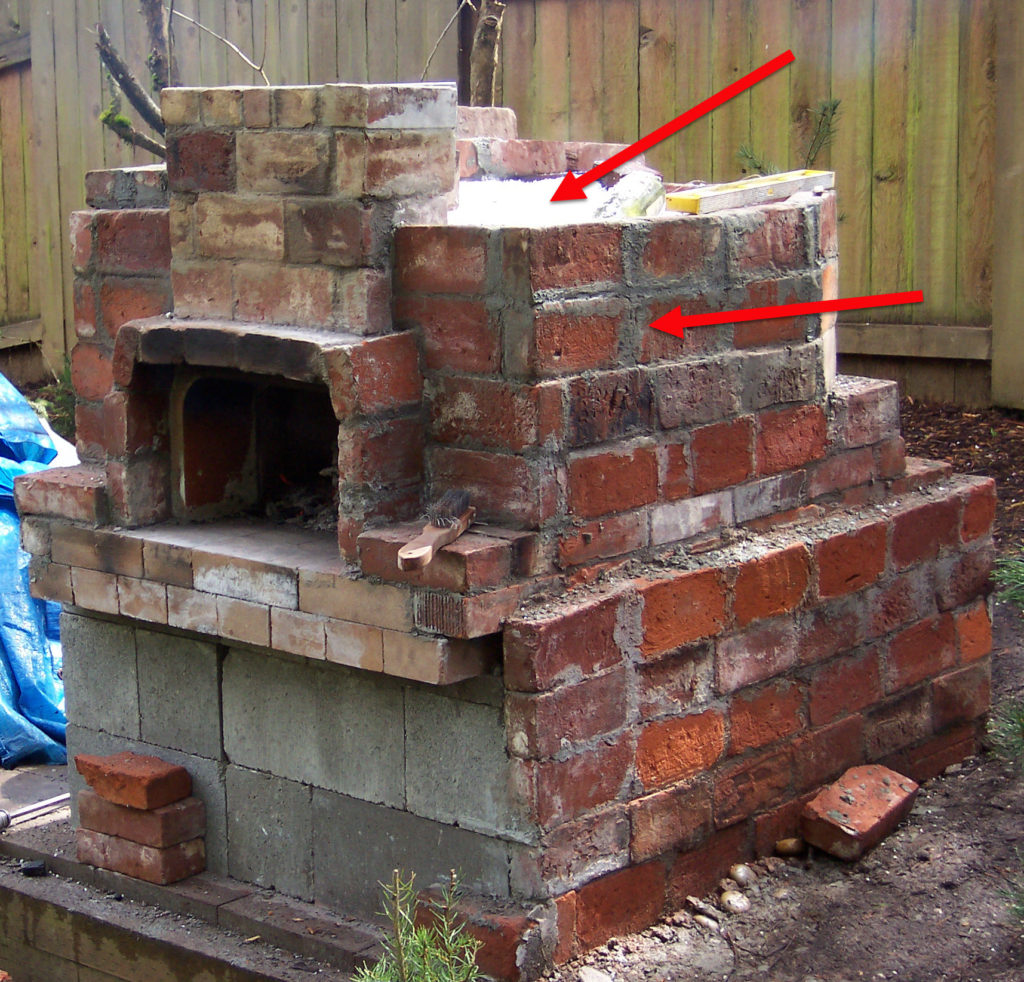
Step 12. Insulate the oven around the dome and sides
You can fill it using vermiculite, broken or whole bricks, bottles, etc… Insulating your oven will help it keep warm, important also when baking in your oven without a fire.
(Estimated time: Steps 5-12 can be done in a day. If you are forming your dome with firebrick you’ll likely need an additional day for drying)
Step 13. Finish the flue
The flue allows heat to escape from the oven. Continue building up the flue with firebrick. We built a flue that was about 40” from the top of the archway. You can cover your firebrick with standard brick if you like. You may find that the flue will need to be re-mortared every few years, depending on your weather and if your oven is covered.
You can also purchase a premade flue. If we had to do it again, we’d purchase a premade metal flue and not try to put brick around it. Be sure to check with your local building code regulations prior to building your flue.

Step 14. Build the oven door
Make a template for the opening of the oven. This will be the oven door. You want the door to fit snugly. Make sure to extend the brick in front of your archway by the width of the oven door (ours is about 2 inches thick).
The oven door will be used to keep your oven dry, as well as baking things such as bread and pie when the oven is at lower temperatures. If you put the oven door in your oven when it is too hot, it will burn through the door even when you don’t have a fire burning (we made that mistake only ONCE!)
To build the door cut two pieces of plywood the same size based on your template. Add a 1-2 inch bottom and sides. Cover the inner-side door with sheet metal. Fill the inside of the door with vermiculite. Paint the front and add a handle. That’s it.
Optional: You could also have a metal one made at your local welding shop.
Estimated time: Steps 14-15 are easily less than one day.
Now that the brick is finished around the dome and the flue is finished, you’ll want to wait about a week before you start a fire, depending on your climate (trust us, this waiting IS the hardest part!). The warmer and dryer your climate, the quicker it will dry. We started cooking pizzas before the finishing touches were done on the oven, we just couldn’t wait.
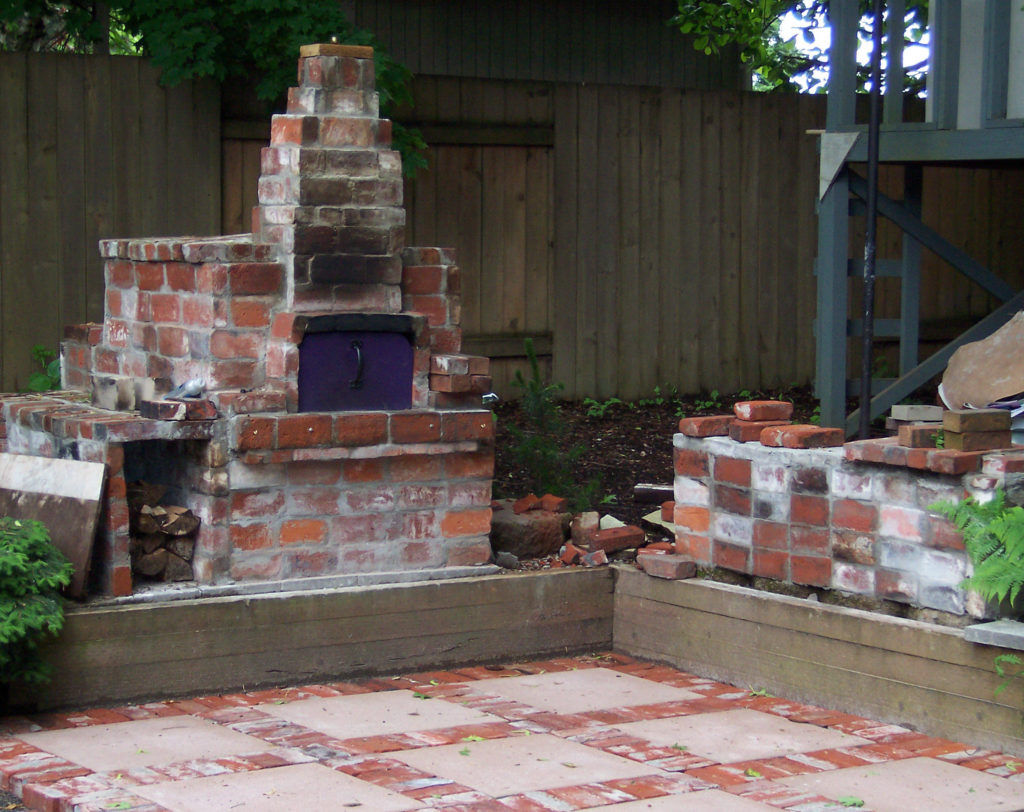
Step 15. Finish the outside of the oven with brick
Continue adding standard brick and mortar to finish the look of your oven.
Step 16. Finish the thermocoupler wiring
Install the thermocouple mini connectors to the end of the wires like on Step 9. Now all that is needed is the Multimeter so you can read the temperature (under $40). Multimeter on Amazon. Be sure to get one that reads high temperatures from 750-900 degrees.
Step 17. Other optional finishing touch items
- Add sides to the oven for additional surface for placing utensils, pizzas, etc. We also made another side table out of brick so we could have additional serving areas (and expanded the brick patio for maximum use).
- A section under the oven for firewood.
- A flue topper for when your oven is not in use and to keep critters out.
- A side door for utensils.
- A cover if you live in areas that get a lot of wet weather
Pizza making supplies
We recommend making your own pizza dough with Tipo 00 flour. Buy online or your local gourmet shop might also have it.
Here is the recipe we use to make our pizza dough. It’s the best!
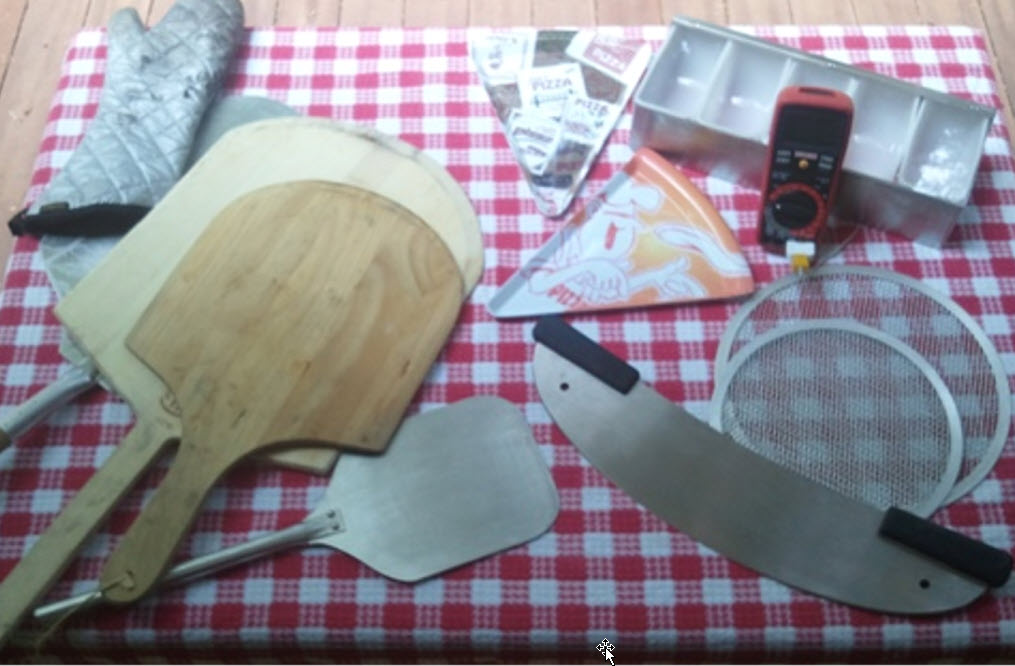
Accessories
- Metal Ash Container
- Large Brush for cleaning
- Metal and wood pizza paddles
- Long mit for extra hot temperatures
- Cooling racks
- Cast iron pans for cooking other food
- Pizza cutter
When making your dough the first time, be patient, it takes a few times to get the knack of the dough prep and cooking in the oven. There’s lots of troubleshooting help available online in forums, but the thing to do is just start making it!
Congratulations! Now Start Making Some Great Kick-Ass Pizzas (and more).
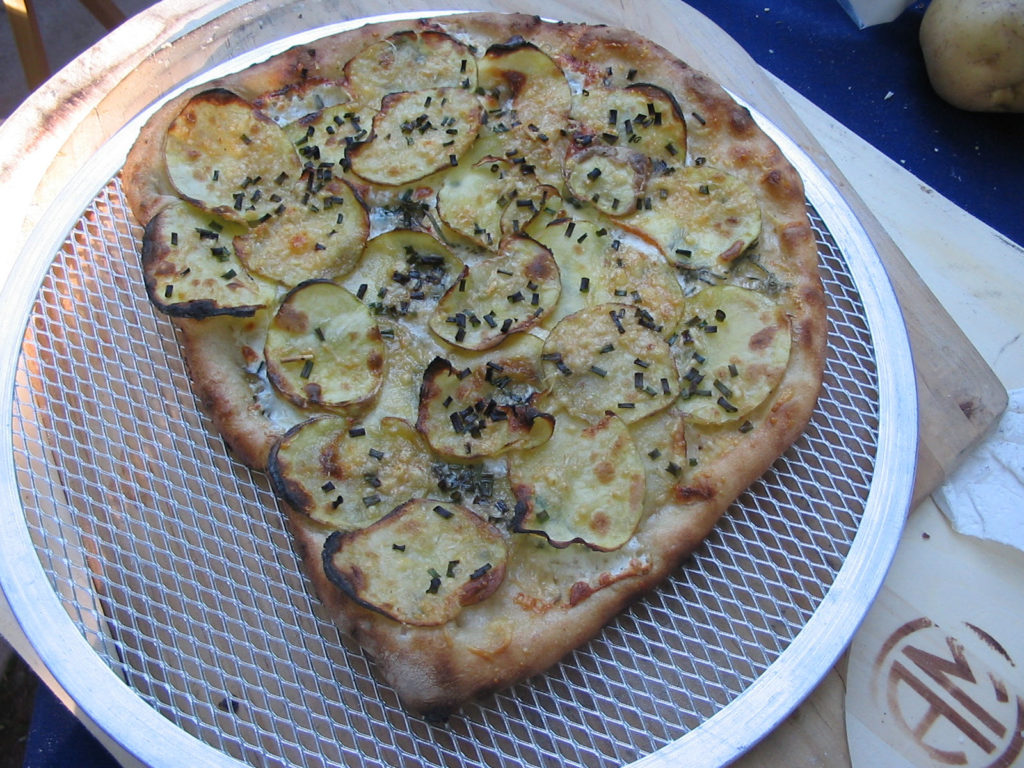
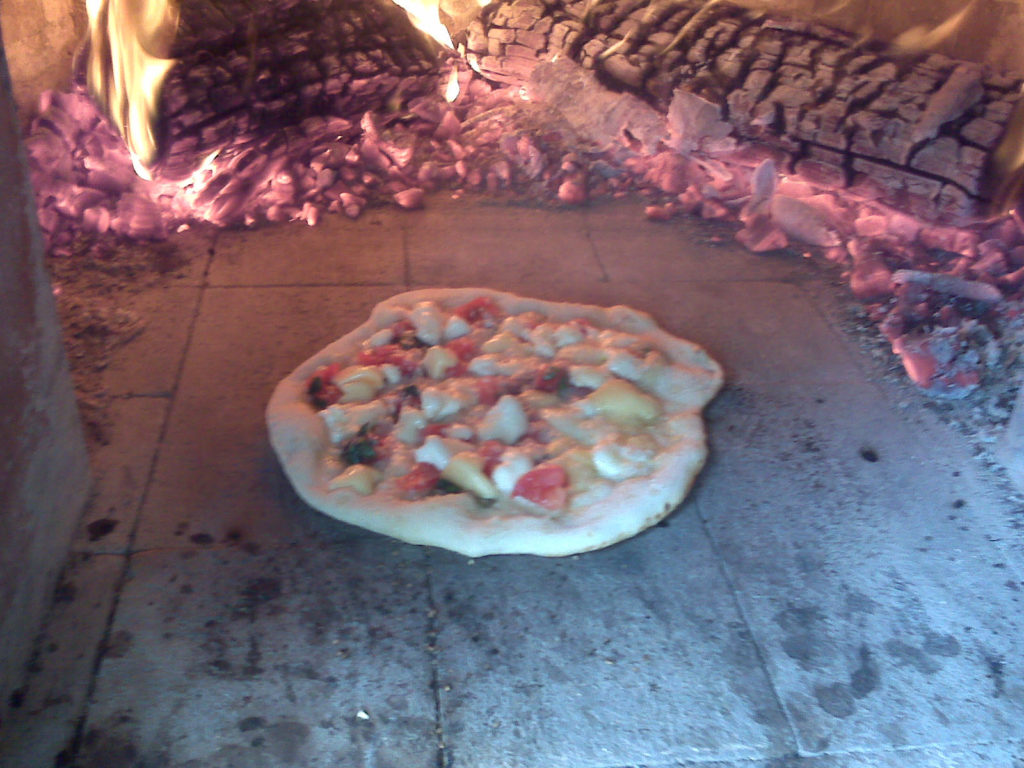
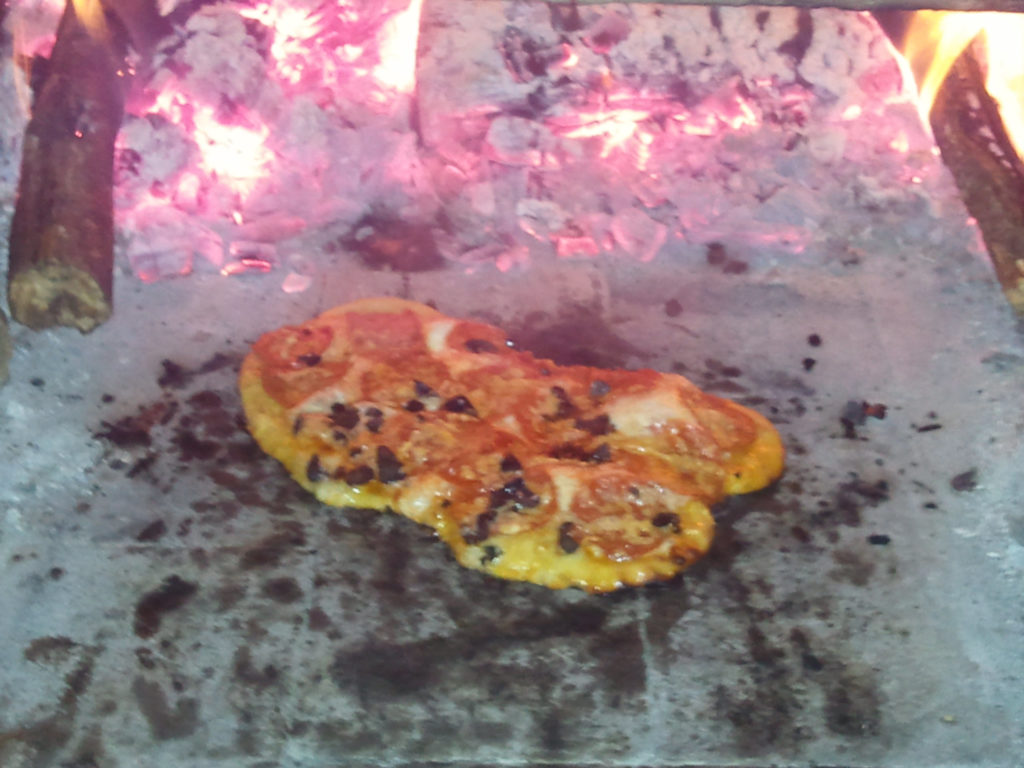
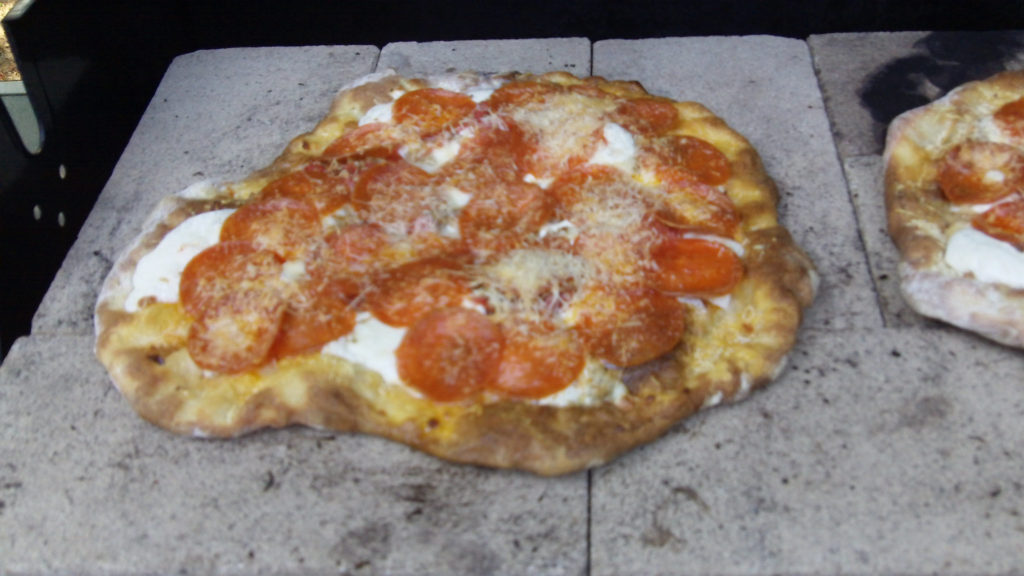
Here are a few of our pizza pies… for more inspiration

Conclusion
Are outdoor pizza ovens worth it? YES!
We hope you’ve been inspired to make your own wood-fired oven. Whether you decide to use a DIY pizza oven kit or make it from scratch, you won’t regret it. We really enjoyed the construction process a lot, and we learned a few things along the way. It has changed the way we cook and other meal preparations such as bread, pie, roast, and more. And we sit outside in front of the wood fire a lot more now. It is also a great conversation piece.
Click here to receive this in a pdf and the following:
- Detailed materials list (.xls Excel format) so you can adjust the list and estimate costs
- A checklist we use for shopping when throwing a pizza party (.xls Excel format)
- Serving large groups – a table for estimating how many batches of dough, sauce and cheese based on the number of guests.
P.S. Since this was such a passion project we spent hours researching and looking at hundreds of brick ovens and pouring over the many forums that people posted how they made theirs, what they would do different, etc. That was some of the most valuable time spent on the project. We’re not sure if a DIY pizza oven kit was available then that we would have chosen that route. For us, it was the project that made it fun. But certainly, it could have saved some time, and if that isn’t a skill that you’re interested in learning then definitely check out a DIY kit.
Cheers to pizza ovens! 🙂
Disclaimer
This book is based on a wood-fired pizza oven built in our own experience as a hobby. We have never been injured or caused injury to others while building or using our oven.
We are not professional oven builders. Always think safety first. Prior to building your oven, be sure to check with your local city and county jurisdiction to ensure you are following the proper guidelines and codes (and that an oven is even permissible where you live). We cannot be held responsible for accidents that occur during the building or use of your wood-fired oven.
Always have safety precautions in place in case a fire occurs outside your oven so that you can act quickly. If you have concerns about the safety of the plans we used to build our oven, we would suggest you purchase a ready-made oven that fits your needs.